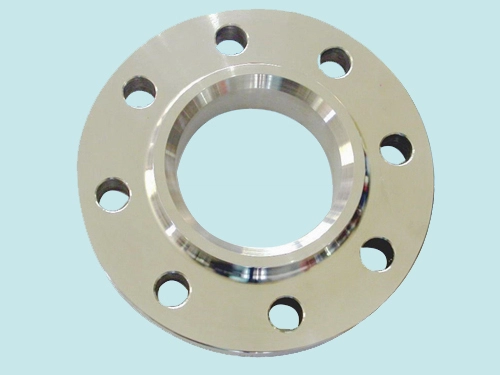
Measurement of Stainless Steel Flanges
1. Preparation before measurement
(1) Before measurement, the first thing is to draw a rough draft of various jointed pipe flanges and number them consecutively in accordance with the position of flanges, thus facilitating clamp installation based on these numbers.
(2) During installation, stainless steel flanges may have different outer diameters, centers or gasket thickness. Hence, machined clamps should conform to the flanges that are to be measured. Besides, dimension measurement of various parts and numbering are the key to clamp machining and installation.
(3) During measurement, three persons should be assigned, two for measurement and the rest one for inspection and filling in tables. A vernier caliper is used as a measuring tool. If vernier calipers are not provided, outside calipers and steel rulers can be used as alternatives. Measurement should be conducted carefully and correctly, because it is the prerequisite for clamp installation.
(4) Measured records should be taken for filling in tables correctly and clearly.
2. Measurement of flanges
(1) At first, accurately measure outer diameters of two flanges respectively, expressed as D1 and D2. For instance, if measured value of D1 or D2 is 157.5mm, then 157.5mm is the desired dimension.
(2) Measure gas dimension of the two flanges, expressed as b. Four distributed points are marked along flange circumference.
(3) Measure the depth, expressed as C (the dimension between flange circumference and bolts). Measure dimension between the mentioned four points and bolts, and select the minimum value.
(4) Measure dimension of different centers of two flanges and select the larger measured value.

Related News
- Stamped Steel Slip-On Flanges
- Design and Finite Element Analysis of Anchor Flanges for Oil & Gas Pipelines
- Forming and Manufacturing Technology of Anchor Flanges
- Structure and Materials of Anchor Flanges
- Flanges for Pressure Vessels
- An Introduction to Socket Welded Neck Flanges
- Heat Treatment & Mechanical Properties of ASTM A350 LF3 Flanges (Part Two)
- Heat Treatment & Mechanical Properties of ASTM A350 LF3 Flanges (Part One)
- High-pressure Wellhead Device Valve Body End Threaded Flanges
- Threaded Flanges at the End of Valve Bodies of High-pressure Oil & Gas Wellhead Devices

